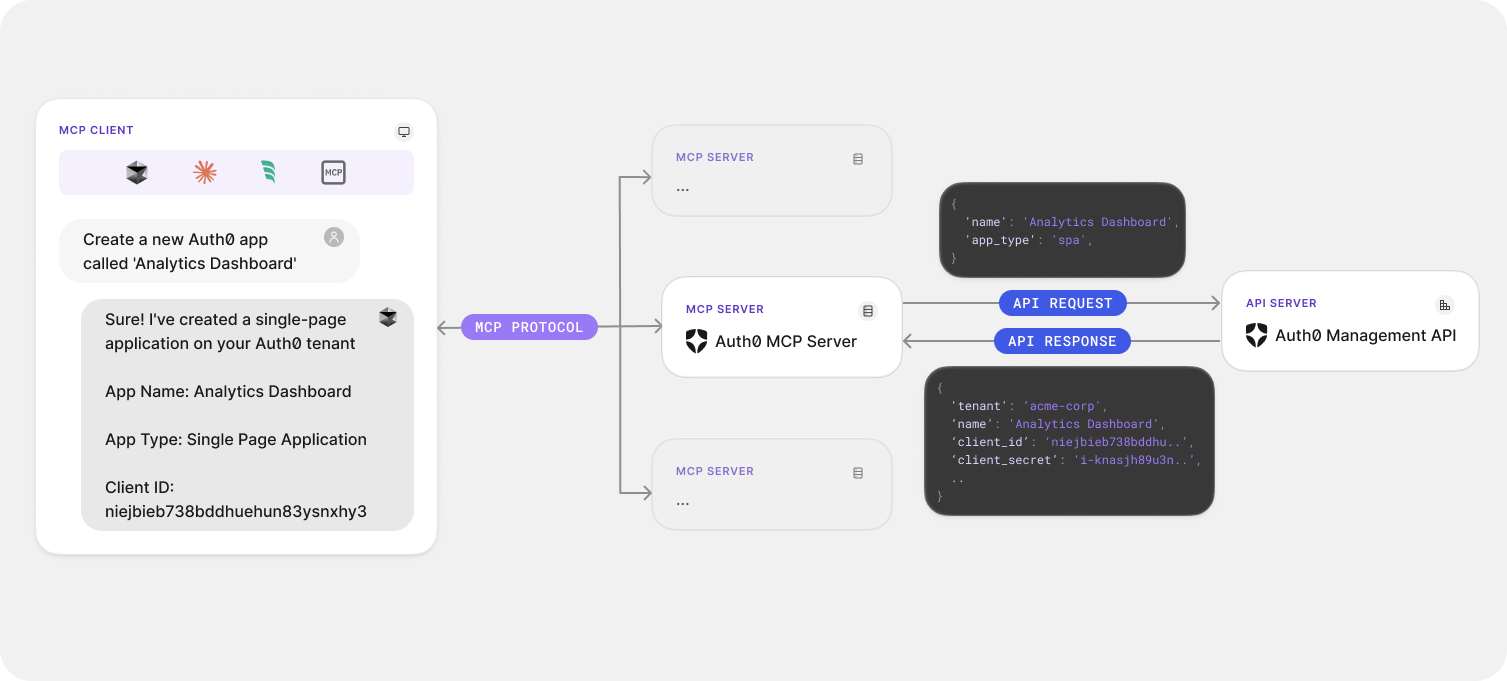
MCP (Model Context Protocol) is an open protocol introduced by Anthropic that standardizes how large language models communicate with external tools, resources or remote services.
Connect Claude, Cursor, or Windsurf to your Auth0 tenant to create apps, deploy Actions, debug logs, and manage users — all without touching the dashboard.
[!CAUTION]
Beta Software Notice: This software is currently in beta and is provided AS IS without any warranties.
- Features, APIs, and functionality may change at any time without notice
- Not recommended for production use or critical workloads
- Support during the beta period is limited
- Issues and feedback can be reported through the GitHub issue tracker
By using this beta software, you acknowledge and accept these conditions.
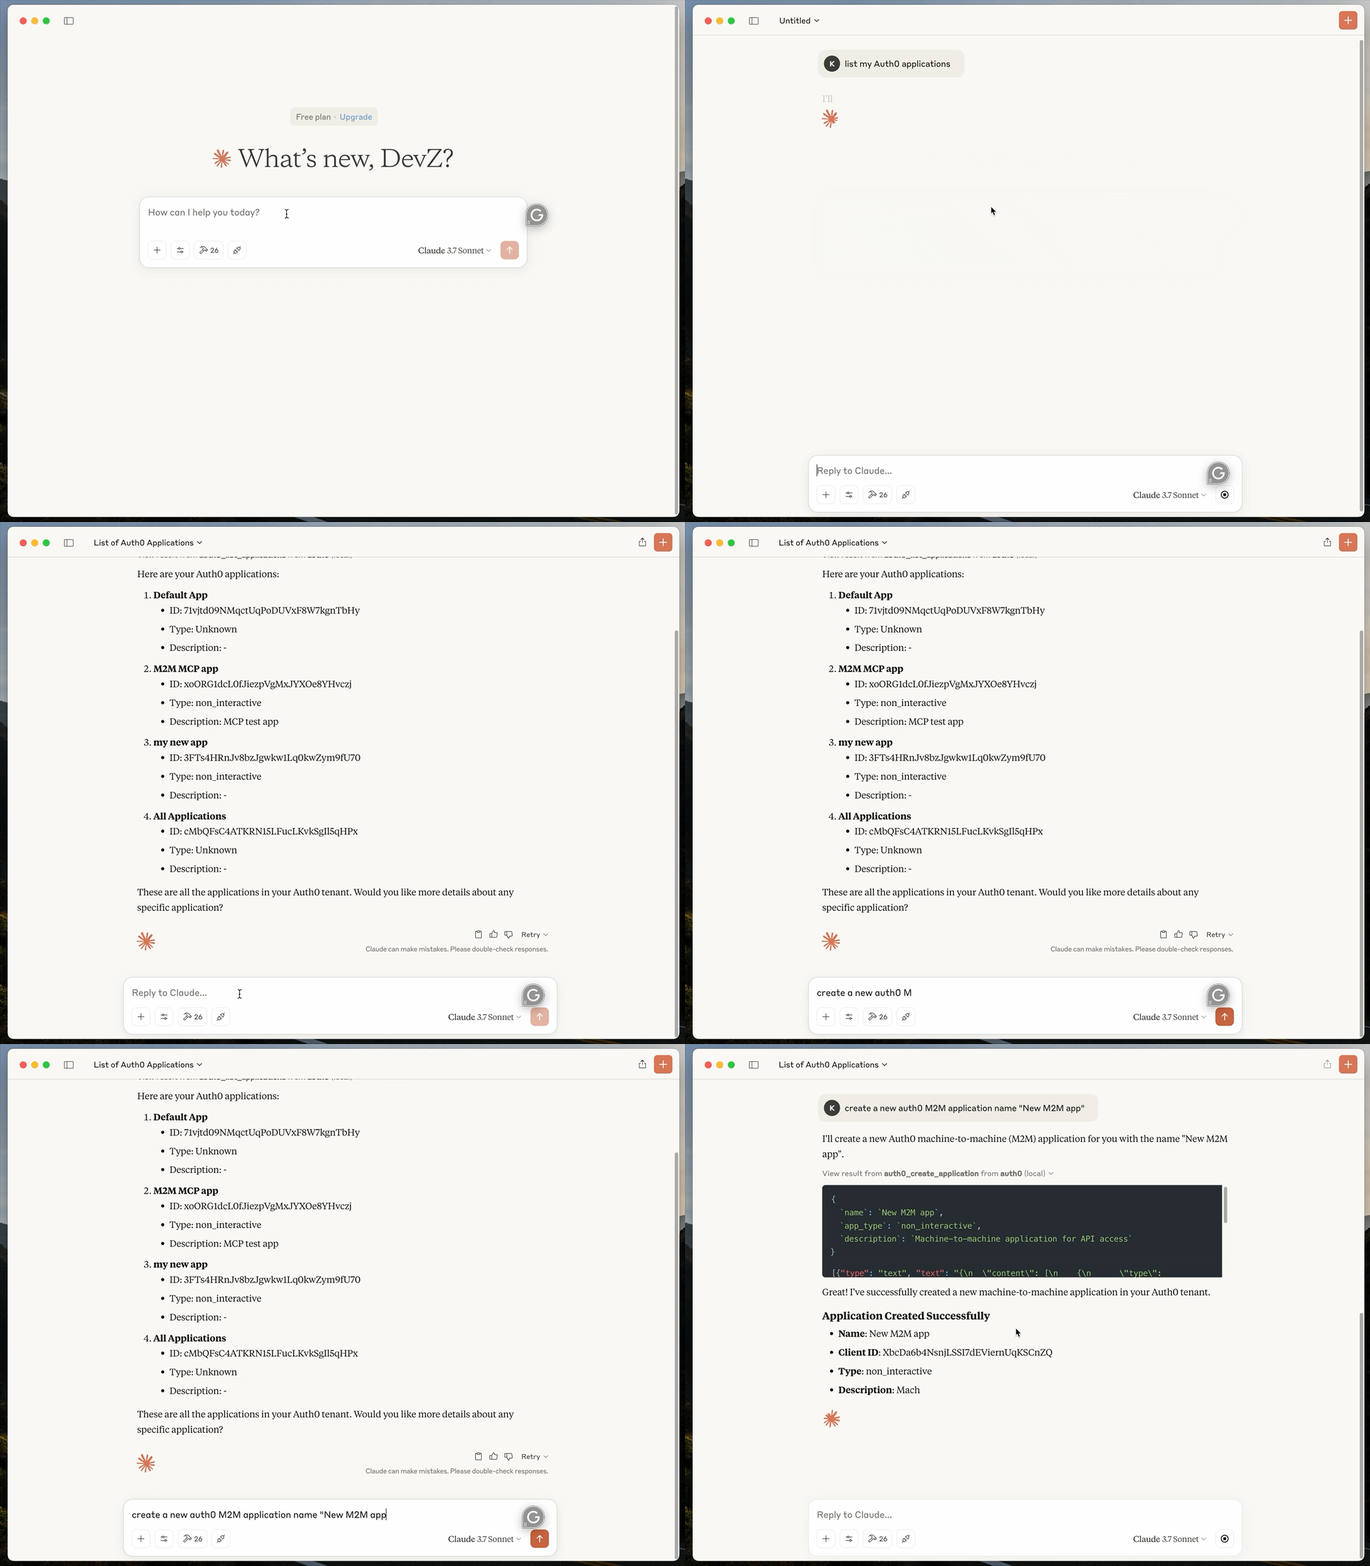
The Auth0 MCP Server integrates with LLMs and AI agents, allowing you to perform various Auth0 management operations using natural language. For instance, you could simply ask Claude Desktop to perform Auth0 management operations:
Create a new Auth0 app and get the domain and client ID
Create and deploy a new Auth0 action to generate a JWT token
Could you check Auth0 logs for logins from 192.108.92.3 IP address?
🚀 Getting Started
Prerequisites:
Install the Auth0 MCP Server
Install Auth0 MCP Server and configure it to work with your preferred MCP Client. The --tools parameter specifies which tools should be available (defaults to * if not provided).
Claude Desktop with all tools
npx @auth0/auth0-mcp-server init
Claude Desktop with read-only tools
npx @auth0/auth0-mcp-server init --read-only
You can also explicitly select read-only tools:
npx @auth0/auth0-mcp-server init --tools 'auth0_list_*,auth0_get_*'
Claude Code
Initialize the Auth0 MCP server for Claude Code
npx @auth0/auth0-mcp-server init --client claude-code
You will be prompted to choose a configuration scope:
- User — written to
~/.claude.json and available across all your projects.
- Project — written to
.mcp.json at a project folder you specify, intended to be checked into version control and shared with your team.
Windsurf
npx @auth0/auth0-mcp-server init --client windsurf
Cursor
Step 1:

Step 2:
npx @auth0/auth0-mcp-server init --client cursor
Cursor with limited tools access
npx @auth0/auth0-mcp-server init --client cursor --tools 'auth0_list_applications,auth0_get_application'
VS Code
npx @auth0/auth0-mcp-server init --client vscode
You can configure VS Code for either global or workspace scope:
- Global: Available in all VS Code instances
- Workspace: Available only in a specific project/repository
The command will prompt you to choose your preferred scope and automatically configure the appropriate mcp.json file.
VS Code with limited tools access
npx @auth0/auth0-mcp-server init --client vscode --tools 'auth0_list_*,auth0_get_*' --read-only
Gemini CLI
Initialize the gemini MCP server for the Gemini CLI
npx @auth0/auth0-mcp-server init --client gemini
Install the Gemini Extension
gemini extensions install https://github.com/auth0/auth0-mcp-server
Codex CLI
Authenticate once with Auth0:
npx @auth0/auth0-mcp-server init
Then add the Auth0 MCP server to Codex:
codex mcp add auth0 --env DEBUG=auth0-mcp --env DBUS_SESSION_BUS_ADDRESS=unix:path=/run/user/1000/bus -- npx -y @auth0/auth0-mcp-server run
You can also add it directly to ~/.codex/config.toml:
[mcp_servers.auth0]
command = "npx"
args = ["-y", "@auth0/auth0-mcp-server", "run"]

[mcp_servers.auth0.env]
DEBUG = "auth0-mcp"
DBUS_SESSION_BUS_ADDRESS = "unix:path=/run/user/1000/bus"
Restart Codex after updating the configuration.
Other MCP Clients
To use Auth0 MCP Server with any other MCP Client, you can manually add this configuration to the client and restart for changes to take effect:
{
  "mcpServers": {
    "auth0": {
      "command": "npx",
      "args": ["-y", "@auth0/auth0-mcp-server", "run"],
      "capabilities": ["tools"],
      "env": {
        "DEBUG": "auth0-mcp"
      }
    }
  }
}
You can add --tools '<pattern>' to the args array to control which tools are available. See Security Best Practices for recommended patterns.
Authorize with Auth0
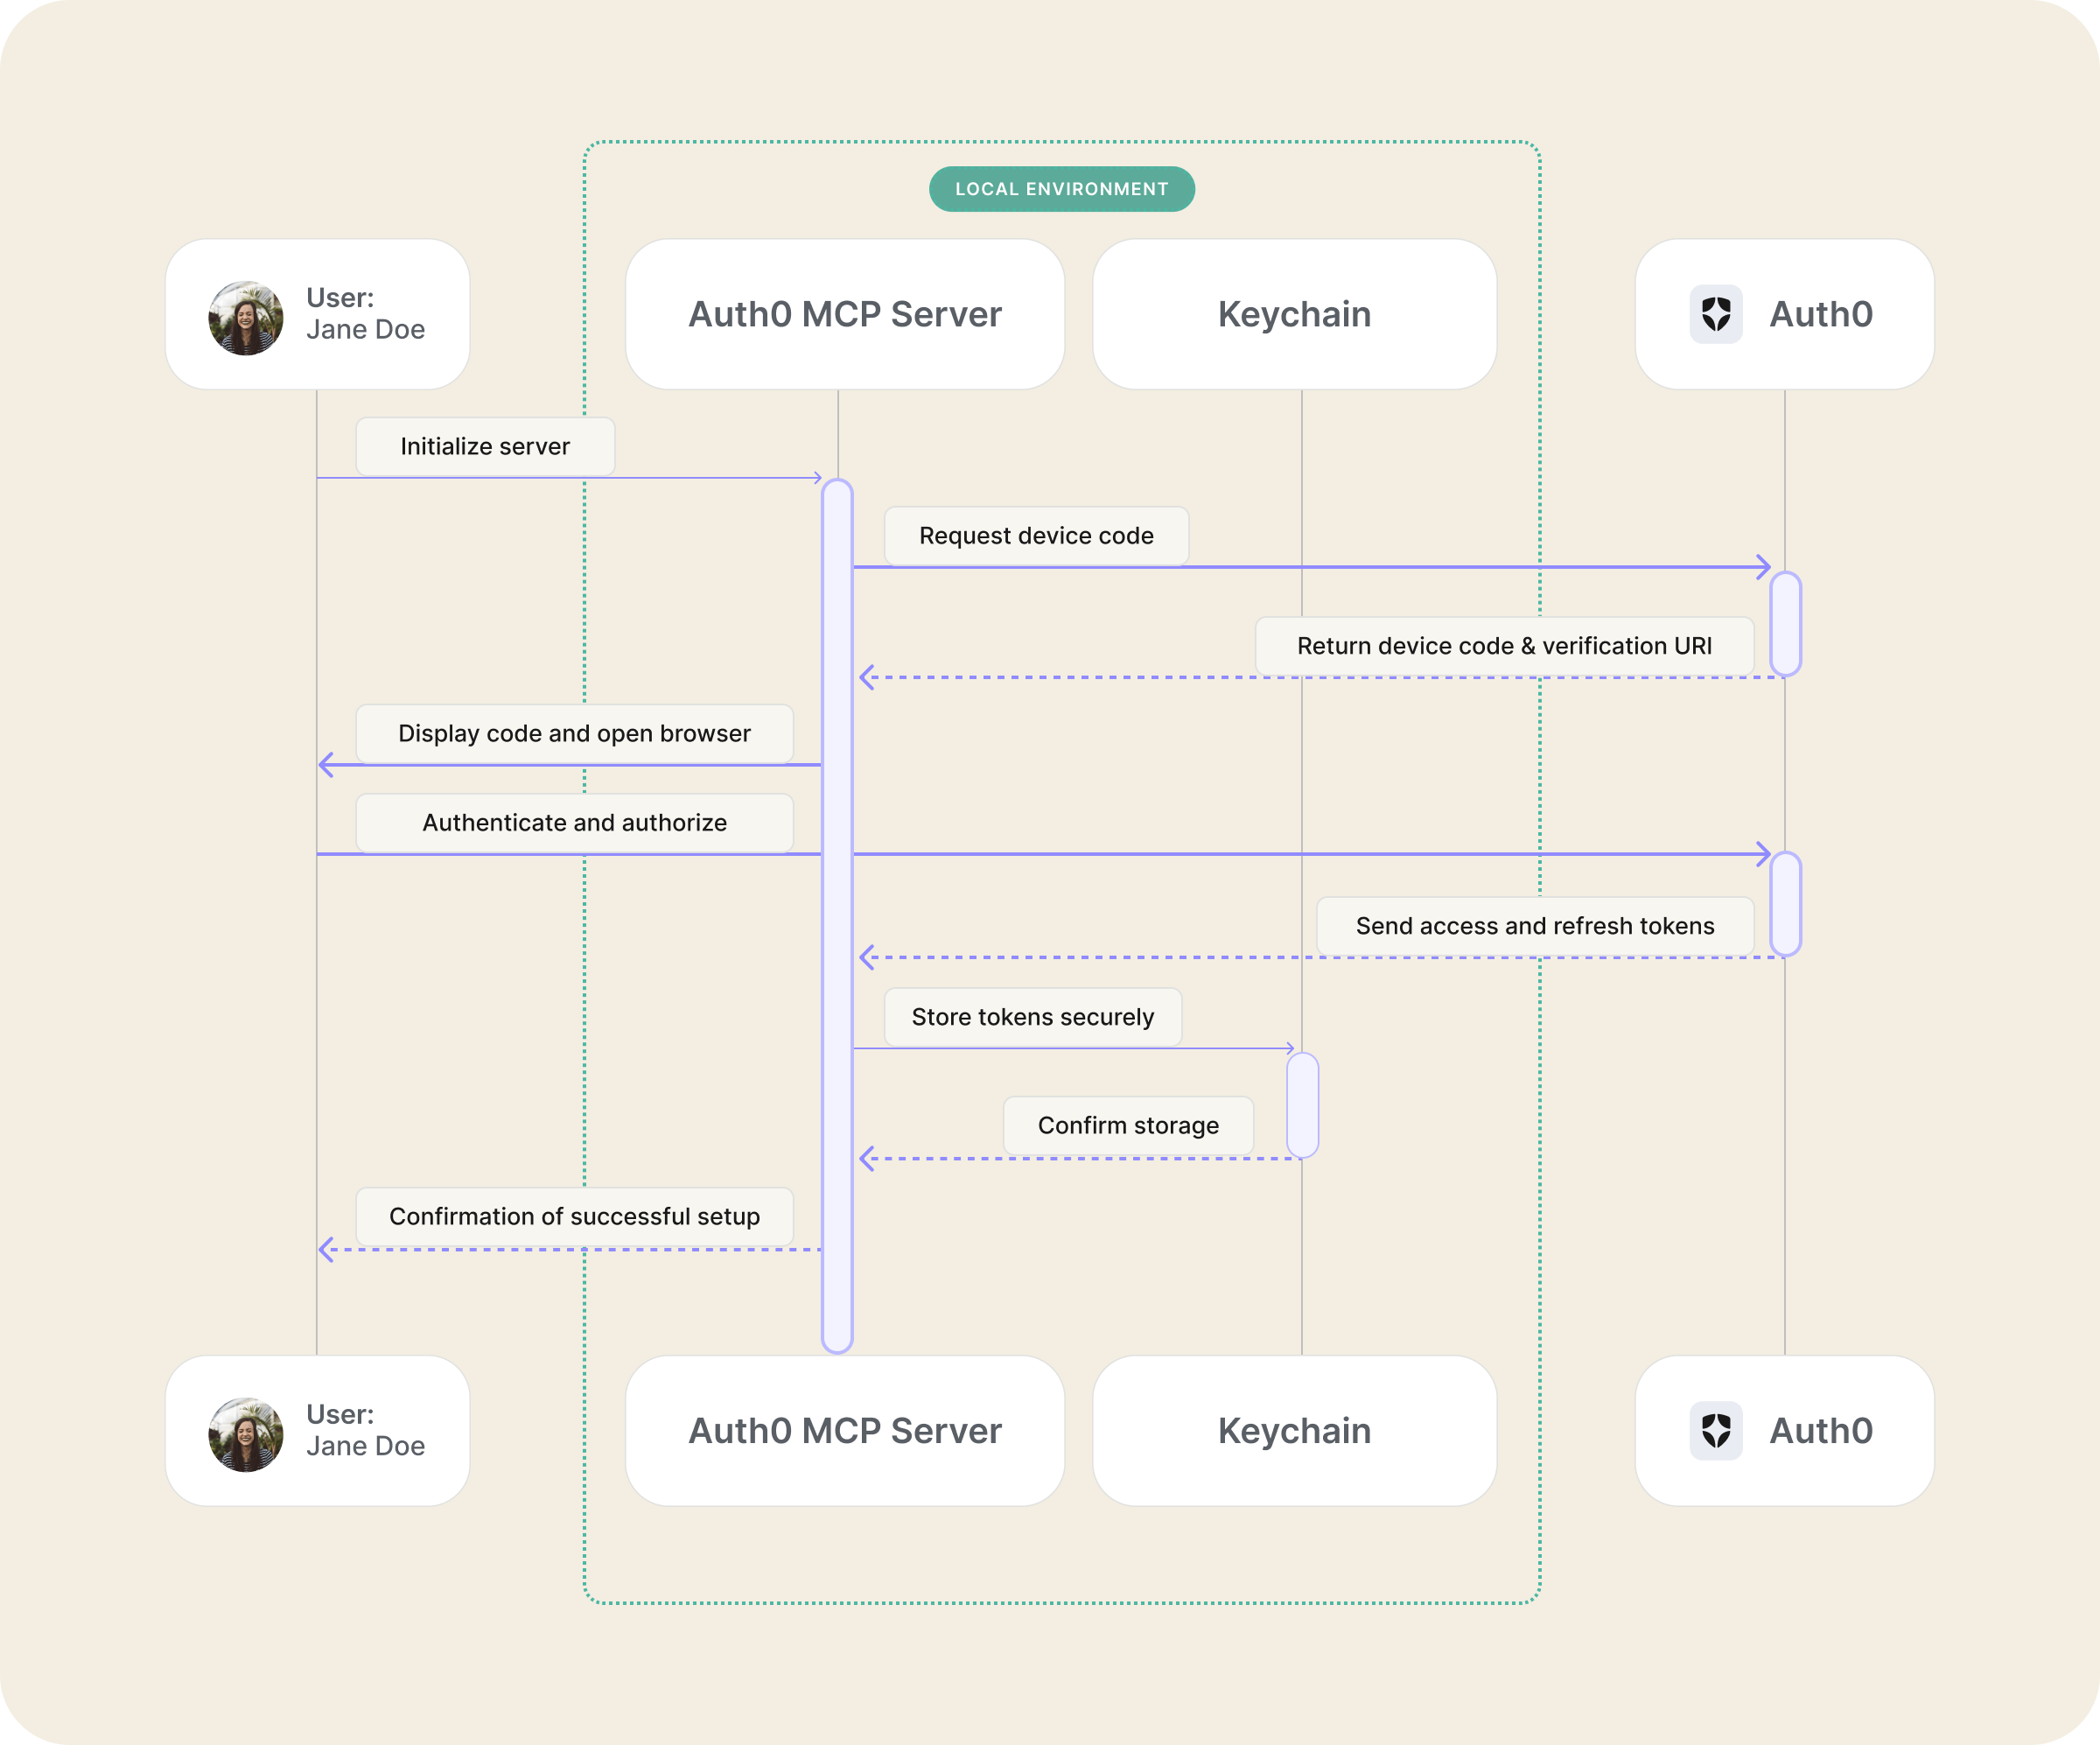
Your browser will automatically open to initiate the OAuth 2.0 device authorization flow. Log into your Auth0 account and grant the requested permissions.
[!NOTE]
Credentials are securely stored in your system's keychain. You can optionally verify storage through your keychain management tool. Check out Authentication for more info.
Verify your integration
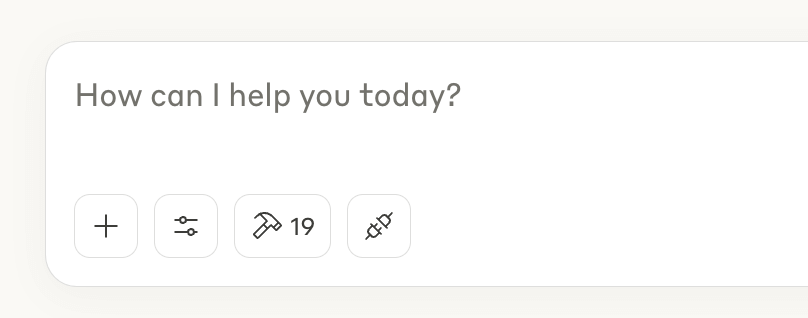
Restart your MCP Client (Claude Desktop, Windsurf, Cursor, etc.) and ask it to help you manage your Auth0 tenant
Onboard your project
To get a project running with Auth0 from scratch, ask your MCP Client to onboard it (e.g. Onboard my Next.js project with Auth0). This invokes the auth0_onboarding tool, which creates an Auth0 application configured for your framework and writes the credentials to a .env file in your project. Under the hood it composes the auth0_create_application and auth0_save_credentials_to_file tools to do this. It then hands off to auth0_get_quickstart_guide, which resolves your callback URLs, updates the application, and returns the framework-specific code to integrate the Auth0 SDK — taking you from no Auth0 setup to a working integration in a single guided flow.
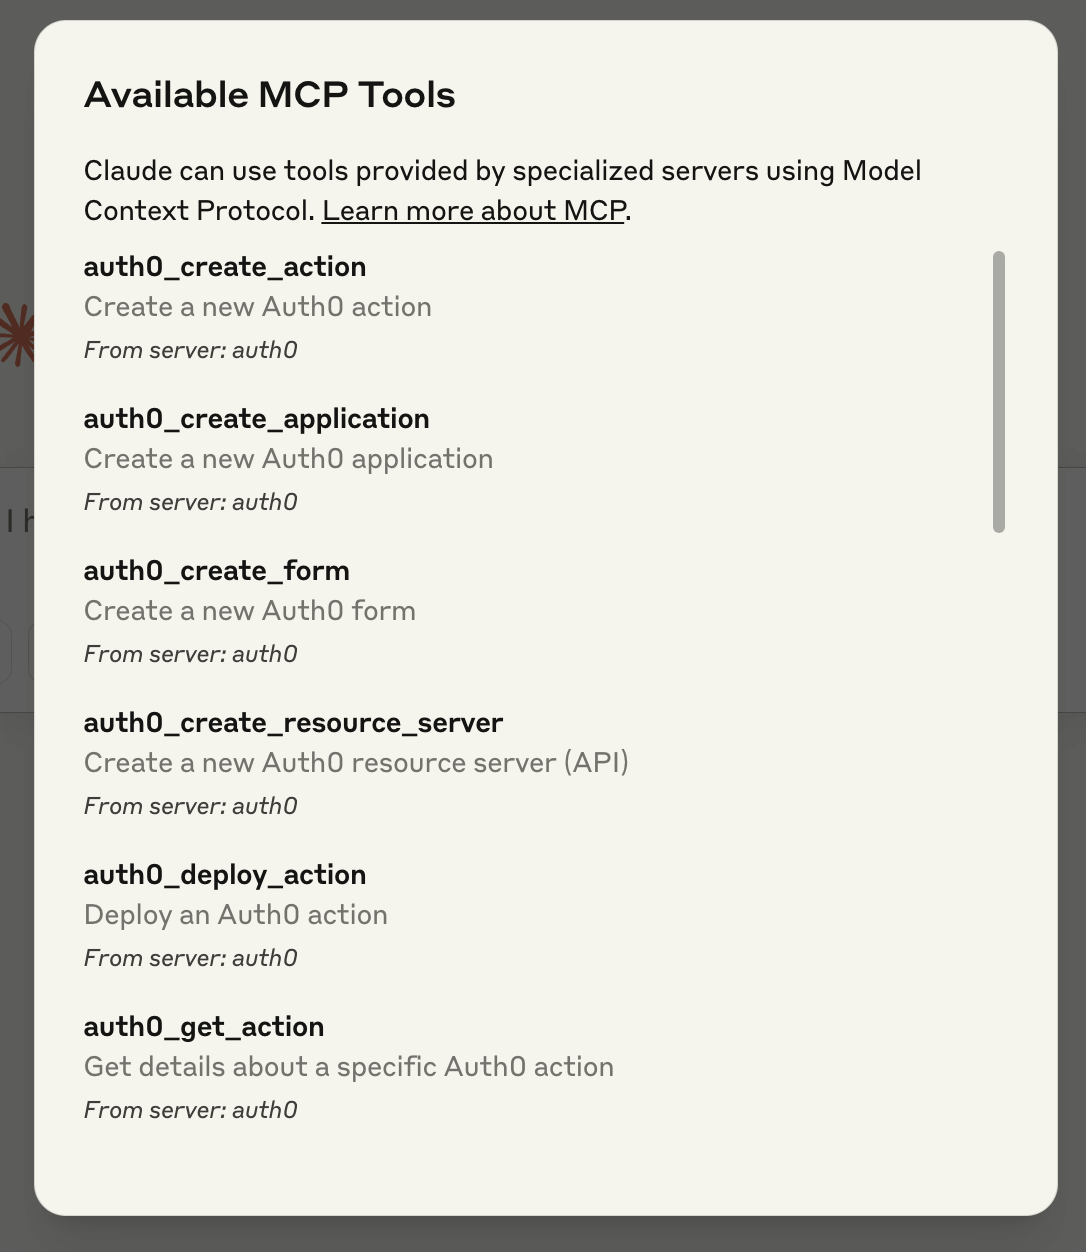
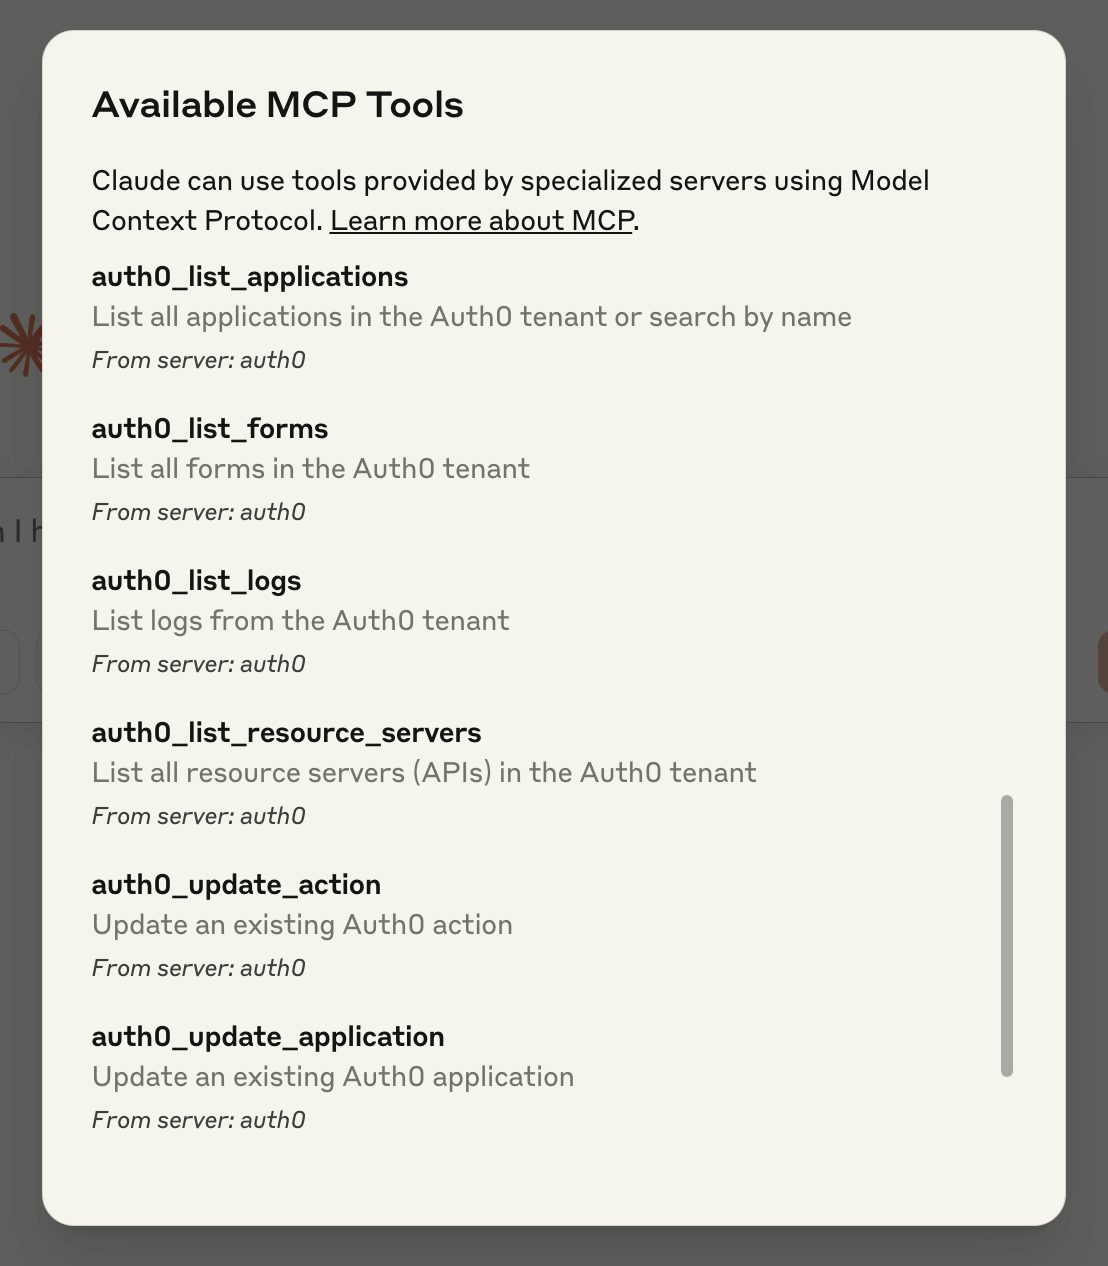
The Auth0 MCP Server provides the following tools for Claude to interact with your Auth0 tenant:
Applications
Onboarding
Resource Servers
Application Grants
Actions
Logs
When configuring the Auth0 MCP Server, it's important to follow security best practices by limiting tool access based on your specific needs. The server provides flexible configuration options that let you control which tools AI assistants can access.
You can easily restrict tool access using the --tools and --read-only flags when starting the server:
# Enable only read-only operations
npx @auth0/auth0-mcp-server run --read-only

# Alternative way to enable only read-only operations
npx @auth0/auth0-mcp-server run --tools 'auth0_list_*,auth0_get_*'

# Limit to just application-related tools
npx @auth0/auth0-mcp-server run --tools 'auth0_*_application*'

# Limit to read-only application-related tools
# Note: --read-only takes priority when used with --tools
npx @auth0/auth0-mcp-server run --tools 'auth0_*_application*' --read-only

# Restrict to only log viewing capabilities
npx @auth0/auth0-mcp-server run --tools 'auth0_list_logs,auth0_get_log'

# Run the server with all tools enabled
npx @auth0/auth0-mcp-server run --tools '*'
[!IMPORTANT]
When both --read-only and --tools flags are used together, the --read-only flag takes priority for security. This means even if your --tools pattern matches non-read-only tools, only read-only operations will be available. This ensures you can rely on the --read-only flag as a security guardrail.
For environments where CLI flags cannot be passed through (for example, MCP bundle installs), the same controls are available as environment variables:
CLI flags take precedence when both are provided.
This approach offers several important benefits:
Enhanced Security: By limiting available tools to only what's needed, you reduce the potential attack surface and prevent unintended modifications to your Auth0 tenant.
Better Performance: Providing fewer tools to AI assistants actually improves performance. When models have access to many tools, they use more of their context window to reason about which tools to use. With a focused set of tools, you'll get faster and more relevant responses.
Resource-Based Access Control: You can configure different instances of the MCP server with different tool sets based on specific needs - development environments might need full access, while production environments could be limited to read operations only.
Simplified Auditing: With limited tools, it's easier to track which operations were performed through the AI assistant.
For most use cases, start with the minimum set of tools needed and add more only when required. This follows the principle of least privilege - a fundamental security best practice.
🛡️ Credential Protection
The server automatically redacts sensitive fields (e.g., client_secret, token etc.) in relevant MCP tool responses, replacing them with [REDACTED]. This prevents secrets from leaking into AI assistant logs or conversation history.
To securely store credentials locally, the auth0_save_credentials_to_file tool writes Auth0 credentials as environment variables to a user-specified file (e.g., .env.local), and automatically adds it to .gitignore. If the file already exists, credentials are appended (preserving existing content); otherwise, a new file is created. This tool can be invoked manually or the AI assistant will automatically prompt you to save credentials after creating an application.
🧪 Security Scanning
We recommend regularly scanning this server, and any other MCP-compatible servers you deploy, with community tools built to surface protocol-level risks and misconfigurations.
These scanners help identify issues across key vulnerability classes including: server implementation bugs, tool definition and lifecycle risks, interaction and data flow weaknesses, and configuration or environment gaps.
Useful tools include:
mcpscan.ai
Web-based scanner that inspects live MCP endpoints for exposed tools, schema enforcement gaps, and other issues.
mcp-scan
CLI tool that simulates attack paths and evaluates server behavior from a client perspective.
These tools are not a substitute for a full audit, but they offer meaningful guardrails and early warnings. We suggest including them in your regular security review process.
If you discover a vulnerability, please follow our responsible disclosure process.
🕸️ Architecture
The Auth0 MCP Server implements the Model Context Protocol, allowing Claude to:
- Request a list of available Auth0 tools
- Call specific tools with parameters
- Receive structured responses from the Auth0 Management API
The server handles authentication, request validation, and secure communication with the Auth0 Management API.
[!NOTE]
The server operates as a local process that connects to Claude Desktop, enabling secure communication without exposing your Auth0 credentials.
🔐 Authentication
The Auth0 MCP Server uses the Auth0 Management API and requires authentication to access your Auth0 tenant.
Initial Setup
To authenticate the MCP Server:
npx @auth0/auth0-mcp-server init
This will start the device authorization flow, allowing you to log in to your Auth0 account and select the tenant you want to use.
[!NOTE]
Authenticating using device authorization flow is not supported for private cloud tenants.
Private Cloud users should authenticate with client credentials.Keep the token lifetime as minimal as possible to reduce security risks. See more
npx @auth0/auth0-mcp-server init --auth0-domain <auth0-domain> --auth0-client-id <auth0-client-id> --auth0-client-secret <auth0-client-secret>
[!IMPORTANT]
Keep limited scope for client credentials M2M application:
Supported scopes:
read:clientscreate:clientsupdate:clientsread:resource_serverscreate:resource_serversupdate:resource_serversread:actionscreate:actionsupdate:actionsread:logsread:formscreate:formsupdate:forms
The `init` command needs to be run whenever:
- You're setting up the MCP Server for the first time
- You've logged out from a previous session
- You want to switch to a different tenant
- Your token has expired
The run command will automatically check for token validity before starting the server and will provide helpful error messages if authentication is needed.
[!NOTE]
Using the MCP Server will consume Management API rate limits according to the subscription plan. Refer to the Rate Limit Policy for more information.
[!TIP]
Using the --no-interaction flag skips the user interaction (press return) to open the browser during setup. This can be useful if the MCP server is initiated in certain environments like an AI Agent.
Session Management
To see information about your current authentication session:
npx @auth0/auth0-mcp-server session
Logging Out
For security best practices, always use the logout command when you're done with a session:
npx @auth0/auth0-mcp-server logout
This ensures your authentication tokens are properly removed from the system keychain.
Authentication Flow
The server uses OAuth 2.0 device authorization flow for secure authentication with Auth0. Your credentials are stored securely in your system's keychain and are never exposed in plain text.
🩺 Troubleshooting
When encountering issues with the Auth0 MCP Server, several troubleshooting options are available to help diagnose and resolve problems.
Start troubleshooting by exploring all available commands and options:
npx @auth0/auth0-mcp-server help
🚥 Operation Modes
🐞 Debug Mode
- More detailed logging
- Enable by setting environment variable:
export DEBUG=auth0-mcp
[!TIP]
Debug mode is particularly useful when troubleshooting connection or authentication issues.
🔑 Scope Selection
The server provides an interactive scope selection interface during initialization:
Interactive Selection: Navigate with arrow keys and toggle selections with spacebar
No Default Scopes: By default, no scopes are selected for maximum security
Glob Pattern Support: Quickly select multiple related scopes with patterns:
# Select all read scopes
npx @auth0/auth0-mcp-server init --scopes 'read:*'

# Select multiple scope patterns (comma-separated)
npx @auth0/auth0-mcp-server init --scopes 'read:*,create:clients,update:actions'
[!NOTE]
Selected scopes determine what operations the MCP server can perform on your Auth0 tenant.
⚙️ Configuration
Other MCP Clients:
To use Auth0 MCP Server with any other MCP Client, you can add this configuration to the client and restart for changes to take effect:
{
  "mcpServers": {
    "auth0": {
      "command": "npx",
      "args": ["-y", "@auth0/auth0-mcp-server", "run"],
      "capabilities": ["tools"],
      "env": {
        "DEBUG": "auth0-mcp"
      }
    }
  }
}
[!NOTE]
You can manually update if needed or if any unexpected errors occur during the npx init command.
🚨 Common Issues
Authentication Failures
- Ensure you have the correct permissions in your Auth0 tenant
- Try re-initializing with
npx @auth0/auth0-mcp-server init
Claude Desktop Can't Connect to the Server
- Restart Claude Desktop after installation
- Check that the server is running with
ps aux | grep auth0-mcp
API Errors or Permission Issues
- Enable debug mode with
export DEBUG=auth0-mcp
- Check your Auth0 token status:
npx @auth0/auth0-mcp-server session
- Reinitialize with specific scopes:
npx @auth0/auth0-mcp-server init --scopes 'read:*,update:*,create:*'
- If a specific operation fails, you may be missing the required scope
Invalid Auth0 Configuration Error
- This typically happens when your authorization token is missing or expired
- Run
npx @auth0/auth0-mcp-server session to check your token status
- If expired or missing, run
npx @auth0/auth0-mcp-server init to authenticate
[!TIP]
Most connection issues can be resolved by restarting both the server and Claude Desktop.
📋 Debug logs
Enable debug mode to view detailed logs:
export DEBUG=auth0-mcp
Get detailed MCP Client logs from Claude Desktop:
# Follow logs in real-time
tail -n 20 -F ~/Library/Logs/Claude/mcp*.log
For advanced troubleshooting, use the MCP Inspector:
npx @modelcontextprotocol/inspector -e DEBUG='auth0-mcp' @auth0/auth0-mcp-server run
For detailed MCP Server logs, run the server in debug mode:
DEBUG=auth0-mcp npx @auth0/auth0-mcp-server run
👨💻 Development
Building from Source
# Clone the repository
git clone https://github.com/auth0/auth0-mcp-server.git
cd auth0-mcp-server

# Install dependencies
npm install

# Build the project
npm run build

# Initiate device auth flow
npx . init

# Configure your MCP Client (e.g. Claude Desktop) with MCP server path
npm run setup
Development Scripts
# Run directly with TypeScript (no build needed)
npm run dev

# Run with debug logs enabled
npm run dev:debug

# Run with MCP inspector for debugging
npm run dev:inspect

# Run the compiled JavaScript version
npm run start
[!NOTE]
This server requires Node.js v18 or higher.
🔒 Security
The Auth0 MCP Server prioritizes security:
- Credentials are stored in the system's secure keychain
- No sensitive information is stored in plain text
- Authentication uses OAuth 2.0 device authorization flow
- No permissions (scopes) are requested by default
- Interactive scope selection allows you to choose exactly which permissions to grant
- Support for glob patterns to quickly select related scopes (e.g.,
read:*)
- Easy token removal via
logout command when no longer needed
[!IMPORTANT]
For security best practices, always use npx @auth0/auth0-mcp-server logout when you're done with a session or switching between tenants. This ensures your authentication tokens are properly removed from the system keychain.
[!CAUTION]
Always review the permissions requested during the authentication process to ensure they align with your security requirements.
Anonymized Analytics Disclosure
Anonymized data points are collected during the use of this MCP server. This data includes the MCP version, operating system, timestamp, and other technical details that do not personally identify you.
Auth0 uses this data to better understand the usage of this tool to prioritize the features, enhancements and fixes that matter most to our users.
To opt-out of this collection, set the AUTH0_MCP_ANALYTICS environment variable to false.
💬 Feedback and Contributing
We appreciate feedback and contributions to this project! Before you get started, please see:
Reporting Issues
To provide feedback or report a bug, please raise an issue on our issue tracker.
Vulnerability Reporting
Please do not report security vulnerabilities on the public GitHub issue tracker. The Responsible Disclosure Program details the procedure for disclosing security issues.
📄 License
This project is licensed under the MIT license. See the LICENSE file for more info.
What is Auth0?

Auth0 is an easy to implement, adaptable authentication and authorization platform. To learn more checkout Why Auth0?