GIMP MCP





Demo
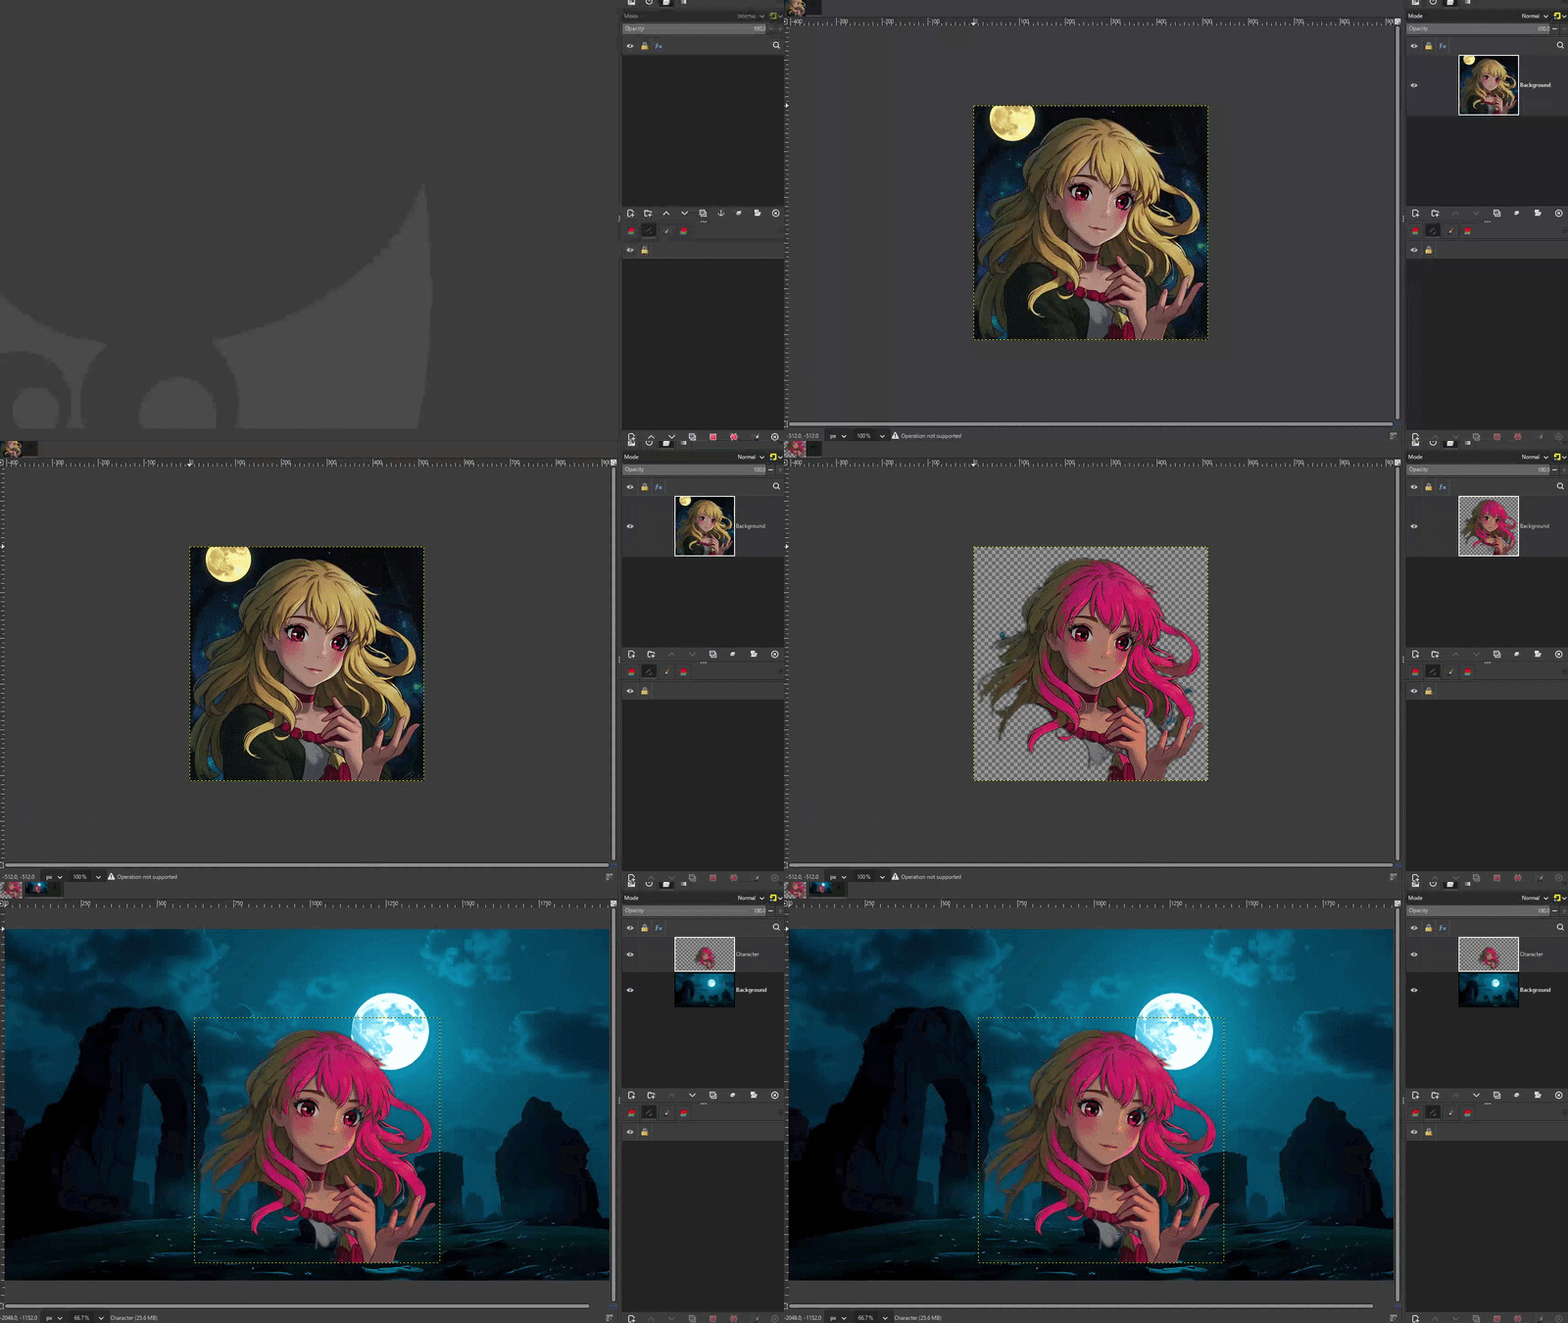
Full demo (with audio): https://github.com/maorcc/gimp-mcp/raw/main/docs/demo.mp4
AI agent using GIMP MCP to remove a background, edit a character's expression, and verify results — all through natural language via Claude
Overview
GIMP MCP bridges GIMP's professional image editing capabilities with AI assistants through the Model Context Protocol. It lets you edit images by describing what you want — and gives the AI a live visual feedback channel to verify each change before moving on.
What makes it different from other GIMP integrations:
- The AI can see the image at any point in the workflow without saving to disk (
get_state_snapshot)
- Supports fully autonomous multi-step pipelines: open → edit → verify → refine → export
- 56 dedicated tool commands covering every major GIMP operation
- Fully compatible with GIMP 3.2.x (all breaking API changes resolved)
Key Features
What Can It Do?
Background Removal with Iterative Verification
The AI removes the background, takes a snapshot to inspect the result, detects remaining pixels, and loops until the image is clean:
"Remove the background from this image and keep looping until only the character remains"
Expression Editing
"Make the character smile — paint a smile arc with teeth over her mouth"
Complex Multi-Step Pipelines
"Open navi_portrait.png, remove the background, verify it's clean,
 then make her smile and export the final result as a PNG"
Color & Tone Work
"Boost the contrast, shift the hue 15 degrees warmer, then show me a before/after zoom of the face"
Text & Compositing
"Add a bold title at the top in white with a subtle drop shadow, then export for web"
Prerequisites
- GIMP 3.2+ — tested on GIMP 3.2.2 (Windows, macOS, Linux)
- Python 3.8+ — for the MCP server
- uv — Python package manager (
pip install uv)
- MCP-compatible AI client — Claude Desktop, Claude Code, Gemini CLI, PydanticAI, etc.
Quick Start
1. Install Dependencies
git clone https://github.com/maorcc/gimp-mcp.git
cd gimp-mcp
uv sync
2. Install the GIMP Plugin
Copy gimp-mcp-plugin.py to GIMP's plug-ins directory and restart GIMP.
Which directory? GIMP names its per-user folder after its major.minor version
(3.0, 3.2, 3.4, …) and creates a fresh one on each minor upgrade, so the folder
moves when you upgrade GIMP (e.g. 3.0 → 3.2). The snippet below auto-selects the
newest one, so it keeps working across upgrades. To check the path manually, open GIMP
and look at Edit → Preferences → Folders → Plug-ins.
Launch GIMP at least once before running this, so its config folder exists.
macOS / Linux:
# Pick the base directory for your platform:
BASE="$HOME/Library/Application Support/GIMP"     # macOS
# BASE="$HOME/.config/GIMP"                        # Linux (standard)
# BASE="$HOME/snap/gimp/current/.config/GIMP"      # Linux (Snap)

# Auto-select the newest GIMP 3.x config directory (3.0, 3.2, 3.4, ...):
GIMP_DIR="$(ls -d "$BASE"/3.* 2>/dev/null | sort -V | tail -1)"
if [ -z "$GIMP_DIR" ]; then
  echo "No GIMP 3.x config dir found under $BASE — launch GIMP once, then re-run." >&2
  exit 1
fi
mkdir -p "$GIMP_DIR/plug-ins/gimp-mcp-plugin"
cp gimp-mcp-plugin.py "$GIMP_DIR/plug-ins/gimp-mcp-plugin/"
chmod +x "$GIMP_DIR/plug-ins/gimp-mcp-plugin/gimp-mcp-plugin.py"
echo "Installed into: $GIMP_DIR/plug-ins/gimp-mcp-plugin"
Windows:
%APPDATA%\GIMP\<VERSION>\plug-ins\gimp-mcp-plugin\gimp-mcp-plugin.py
Replace <VERSION> with your GIMP major.minor (e.g. 3.2). No chmod needed on Windows. Just copy and restart GIMP.
For all platforms: GIMP Plugin Installation Guide
3. Start the MCP Server in GIMP
- Open any image in GIMP
- Go to Tools > MCP > Start MCP Server
- Server starts on
localhost:9877
Claude Desktop
~/.config/Claude/claude_desktop_config.json (Linux/macOS) or %APPDATA%\Claude\claude_desktop_config.json (Windows):
{
  "mcpServers": {
    "gimp": {
      "command": "uv",
      "args": ["run", "--directory", "/full/path/to/gimp-mcp", "gimp_mcp_server.py"]
    }
  }
}
Claude Code
cd /path/to/gimp-mcp
claude  # .mcp.json is auto-detected
Or manually:
claude mcp add gimp-mcp -- uv run --directory /full/path/to/gimp-mcp gimp_mcp_server.py
Gemini CLI
~/.config/gemini/.gemini_config.json:
{
  "mcpServers": {
    "gimp": {
      "command": "uv",
      "args": ["run", "--directory", "/full/path/to/gimp-mcp", "gimp_mcp_server.py"]
    }
  }
}
PydanticAI
from pydantic_ai import Agent
from pydantic_ai.mcp import MCPServerStdio

server = MCPServerStdio('uv', args=['run', '--directory', '/path/to/gimp-mcp', 'gimp_mcp_server.py'])
agent = Agent('openai:gpt-4o', mcp_servers=[server])
👁️ Visual Feedback
get_state_snapshot(image_index, max_size, region, label)
Returns a live PNG of the current image state — the AI's primary feedback mechanism. Call this between any edits to verify the result without saving to disk.
# Full image snapshot
snapshot = get_state_snapshot(max_size=512)

# Zoom into a face region for detail inspection
snapshot = get_state_snapshot(
    region={"x": 140, "y": 80, "width": 240, "height": 300},
    max_size=512,
    label="face-check"
)
This enables iterative agentic workflows: edit → snapshot → assess → refine → repeat.
get_image_bitmap(image_index, max_width, max_height, region)
Lower-level bitmap fetch with region extraction and scaling. Returns base64-encoded PNG.
🎨 Adjustments
✂️ Selections
🗂️ Layers
🖌️ Drawing & Fill
🔤 Text
✨ Filters & Effects
📁 File Operations
🔍 Info & Context
AI Agent Feedback Loop
The get_state_snapshot tool enables a pattern where the AI loops until a goal is visually confirmed:
┌─────────────┐
│  Apply edit │
└──────┬──────┘
       │
       ▼
┌─────────────────┐
│ get_state_      │  ← AI sees live PNG, no disk save needed
│ snapshot()      │
└──────┬──────────┘
       │
       ▼
┌─────────────────┐     ┌──────────────────┐
│ Goal achieved?  │─ No─▶ Adjust & retry   │
└──────┬──────────┘     └──────────────────┘
       │ Yes
       ▼
┌─────────────┐
│   Export    │
└─────────────┘
Example: Iterative Background Removal
See bg_remove_iterative.py for a complete example. The AI:
- Removes the background using edge-seeded contiguous select
- Takes a snapshot to check the result
- Scans for remaining background-colored pixels
- Runs targeted removal passes with progressively finer grids (25px → 1px)
- Runs a final despeckle pass for isolated pixels
- Loops until no background pixels remain
Example Scripts
Run the test suite to verify your setup:
python run_tests.py
# Expected: 56/56 PASSED
Technical Architecture
Plugin ↔ Server Communication
AI Client (Claude, etc.)
      │  MCP (stdio)
      ▼
gimp_mcp_server.py          ← MCP tool definitions
      │  TCP JSON  :9877
      ▼
gimp-mcp-plugin.py          ← Runs inside GIMP process
      │  PyGObject
      ▼
GIMP 3.2 (gi.repository.Gimp)
- MCP server translates tool calls into JSON commands sent to the plugin over TCP
- Plugin executes operations directly in the GIMP process via PyGObject
- Two message formats:
{"type": "...", "params": {...}} for named tools, {"cmds": ["python..."]} for arbitrary exec
GIMP 3.2 Compatibility Notes
GIMP 3.x introduced breaking API changes from GIMP 2.x. Key fixes included in this release:
Troubleshooting
"Could not connect to GIMP"
- GIMP must be running with an image open
- Start the MCP server: Tools > Start MCP Server
- Check port 9877 is not blocked by firewall
Plugin Not Visible in GIMP
- Look under Tools > MCP (the plugin adds an
MCP submenu, not a top-level Tools entry)
- Confirm the plugin file is in the correct directory (see install steps above)
- Upgraded GIMP recently? A minor upgrade (e.g. 3.0 → 3.2) moves the per-user config folder to a new version directory; reinstall the plugin into the new version's
plug-ins folder. Verify the active path via Edit > Preferences > Folders > Plug-ins.
- On Linux/macOS: ensure the file has execute permission (
chmod +x)
- Restart GIMP after installation
- Check Filters > Script-Fu > Console for error messages
Tests Failing
Run the test suite and check the failure list:
python run_tests.py
Each failure includes the tool name and error — most issues on GIMP 3.2 are covered by the fixes above.
Debug Mode
GIMP_MCP_DEBUG=1 uv run --directory /path/to/gimp-mcp gimp_mcp_server.py
Example Output

"Draw me a face and a sheep" — generated entirely through natural language via GIMP MCP
Future Enhancements
- 📚 Recipe Collection: Reusable workflow templates (portrait cleanup, product photo, etc.)
- ↩️ Undo System: History management and rollback via MCP
- 🚀 Dynamic Discovery: Auto-generate MCP tools from GIMP's full PDB procedure database
- 🔒 Security: Sandboxed execution for untrusted command inputs
- ⚡ Performance: Optimized bitmap transfer for large images
- 🌐 Remote Access: Network-accessible GIMP instances
Contributing
Contributions are welcome — bug fixes, new tools, documentation, or example scripts. Open a PR or issue on GitHub.
Development Setup
Install dev dependencies and activate the pre-commit hook so ruff runs on every commit:
uv sync
uv run pre-commit install
After this, ruff checks staged files on each git commit (with --fix applied automatically). The same check runs in CI, so the hook is just a fast local safety net.
To bump the pinned hook versions later:
uv run pre-commit autoupdate