Azure DevOps MCP Integration
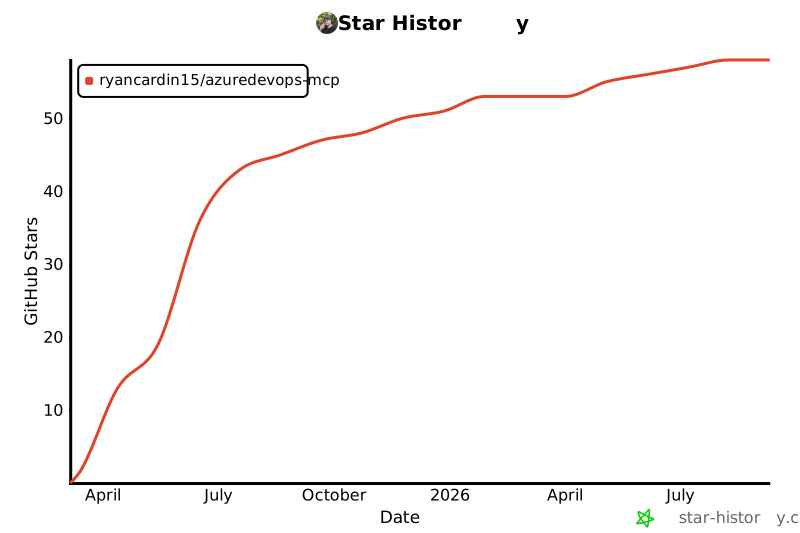
Star History
A powerful integration for Azure DevOps that provides seamless access to work items, repositories, projects, boards, and sprints through the Model Context Protocol (MCP) server.
Overview
This server provides a convenient API for interacting with Azure DevOps services, enabling AI assistants and other tools to manage work items, code repositories, boards, sprints, and more. Built with the Model Context Protocol, it provides a standardized interface for communicating with Azure DevOps.
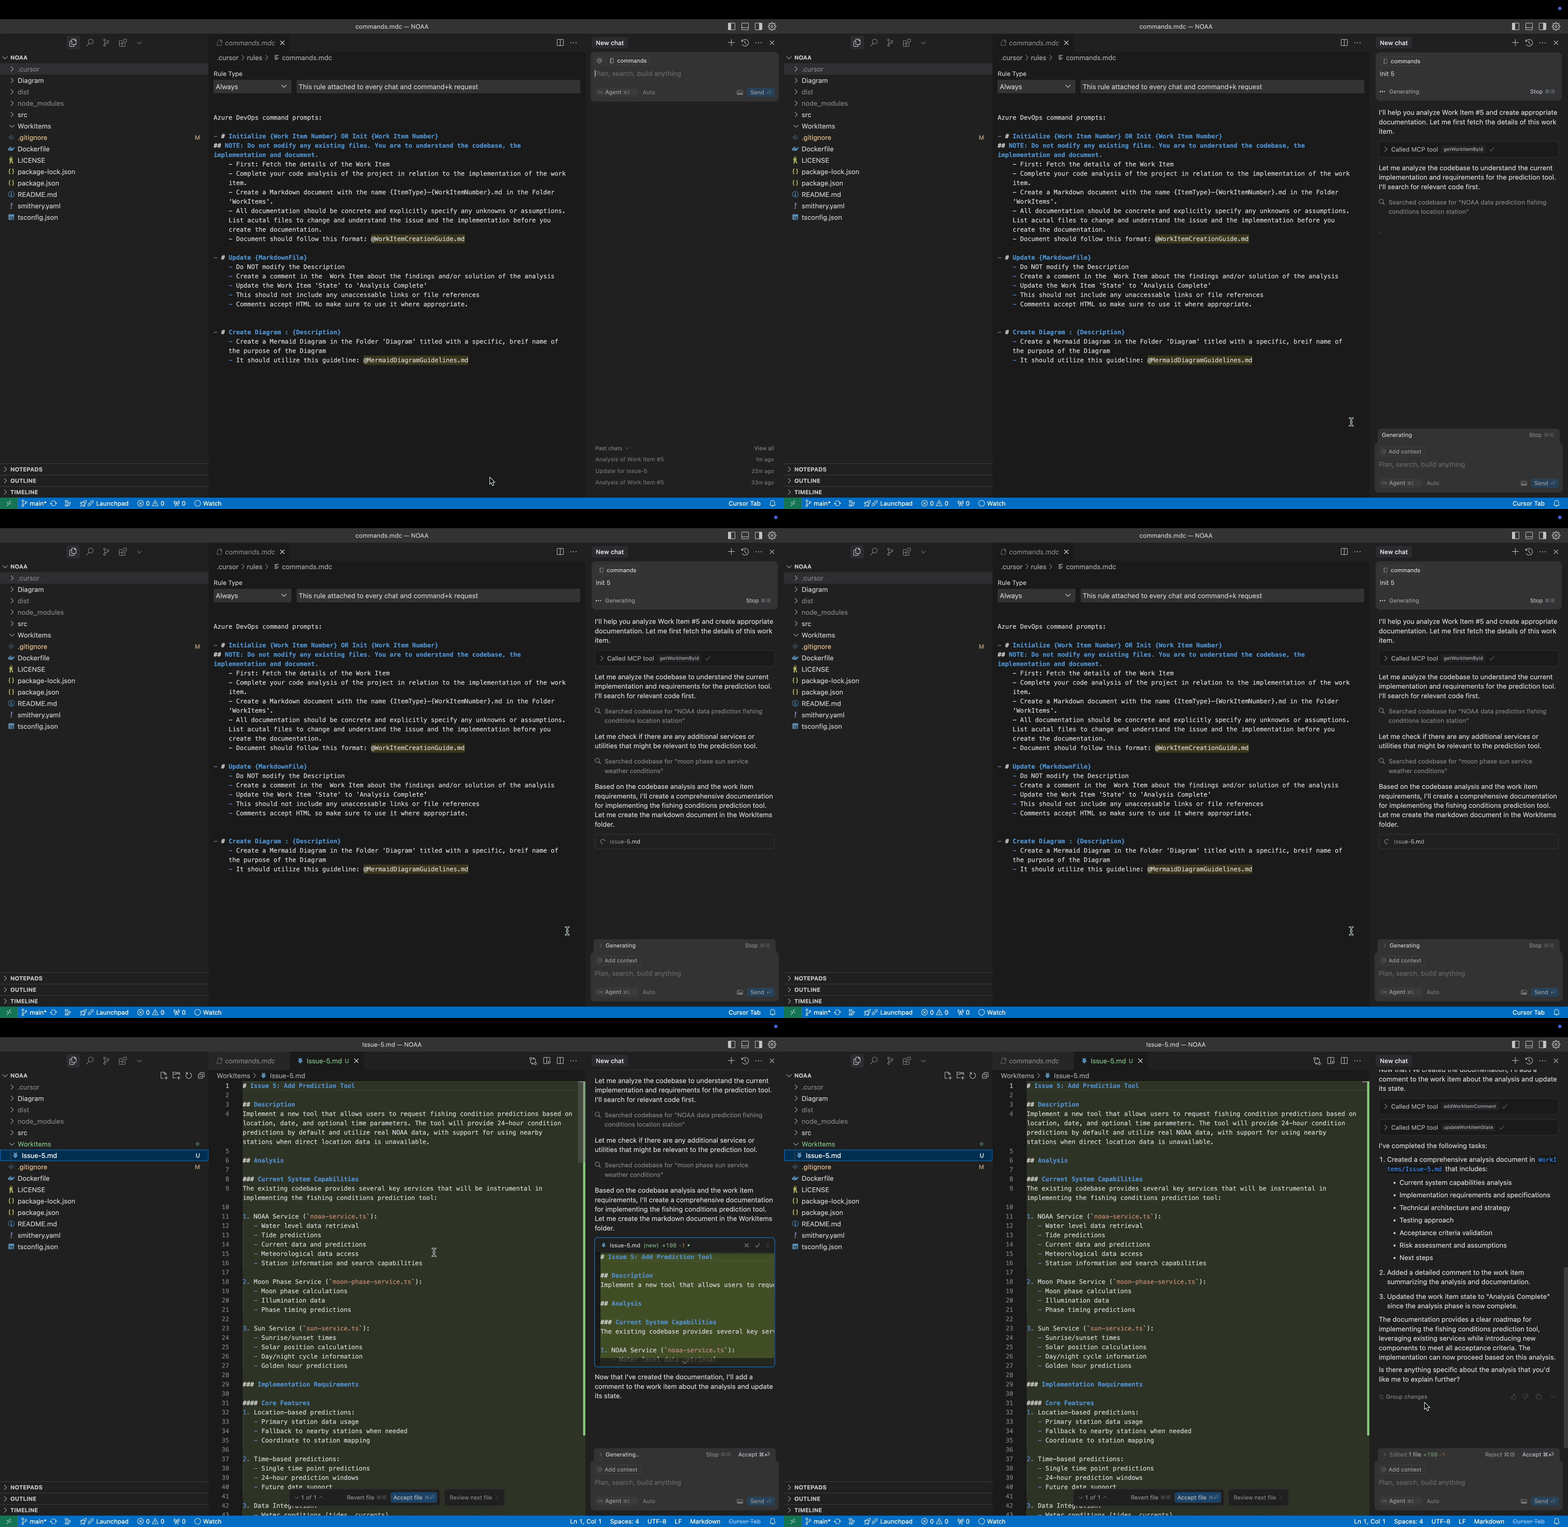
Demo
Features
The integration is organized into eight main tool categories:
- List work items using WIQL queries
- Get work item details by ID
- Search for work items
- Get recently updated work items
- Get your assigned work items
- Create new work items
- Update existing work items
- Add comments to work items
- Update work item state
- Assign work items
- Create links between work items
- Bulk create/update work items
- Get team boards
- Get board columns
- Get board items
- Move cards on boards
- Get sprints
- Get the current sprint
- Get sprint work items
- Get sprint capacity
- Get team members
- List projects
- Get project details
- Create new projects
- Get areas
- Get iterations
- Create areas
- Create iterations
- Get process templates
- Get work item types
- Get work item type fields
- List repositories
- Get repository details
- Create repositories
- List branches
- Search code
- Browse repositories
- Get file content
- Get commit history
- List pull requests
- Create pull requests
- Get pull request details
- Get changed files in a pull request
- Get pull request comments
- Approve pull requests
- Merge pull requests
- Run automated tests
- Get test automation status
- Configure test agents
- Create test data generators
- Manage test environments
- Get test flakiness analysis
- Get test gap analysis
- Run test impact analysis
- Get test health dashboard
- Run test optimization
- Create exploratory sessions
- Record exploratory test results
- Convert findings to work items
- Get exploratory test statistics
- Run security scans
- Get security scan results
- Track security vulnerabilities
- Generate security compliance reports
- Integrate SARIF results
- Run compliance checks
- Get compliance status
- Create compliance reports
- Manage security policies
- Track security awareness
- Rotate secrets
- Audit secret usage
- Configure vault integration
- List artifact feeds
- Get package versions
- Publish packages
- Promote packages
- Delete package versions
- List container images
- Get container image tags
- Scan container images
- Manage container policies
- Manage universal packages
- Create package download reports
- Check package dependencies
- Get AI-powered code reviews
- Suggest code optimizations
- Identify code smells
- Get predictive bug analysis
- Get developer productivity metrics
- Get predictive effort estimations
- Get code quality trends
- Suggest work item refinements
- Suggest automation opportunities
- Create intelligent alerts
- Predict build failures
- Optimize test selection
Installation
Quick Start with NPX (Recommended)
The easiest way to use the Azure DevOps MCP server is via NPX:
npx @ryancardin/azuredevops-mcp-server@latest
No installation or build steps required! Just set your environment variables and run.
One-Click Installation for Cursor
Click the button below to install the Azure DevOps MCP server directly in Cursor:

Important: After installation in Cursor, you must update the environment variables in your Cursor MCP configuration with your actual Azure DevOps details.
Learn more about Cursor deeplinks at https://docs.cursor.com/deeplinks
Alternative Installation Methods
Global NPM Installation
npm install -g @ryancardin/azuredevops-mcp-server
azuredevops-mcp-server
Via Smithery (Claude Desktop)
npx -y @smithery/cli install @RyanCardin15/azuredevops-mcp --client claude
Development Setup
For development or customization:
Clone the repository:
git clone https://github.com/RyanCardin15/AzureDevOps-MCP.git
cd AzureDevOps-MCP
Install dependencies:
npm install
Build the project:
npm run build
Run locally:
npm start
Configuration
Prerequisites
- Node.js (v16 or later)
- An Azure DevOps account with a Personal Access Token (PAT) or appropriate credentials
Environment Variables
Configure the server using environment variables. You can set these in your shell, .env file, or in your MCP client configuration:
For Azure DevOps Services (Cloud)
AZURE_DEVOPS_ORG_URL=https://dev.azure.com/your-organization
AZURE_DEVOPS_PROJECT=your-default-project
AZURE_DEVOPS_IS_ON_PREMISES=false
AZURE_DEVOPS_AUTH_TYPE=pat
AZURE_DEVOPS_PERSONAL_ACCESS_TOKEN=your-personal-access-token
For Azure DevOps Server (On-Premises)
AZURE_DEVOPS_ORG_URL=https://your-server/tfs
AZURE_DEVOPS_PROJECT=your-default-project
AZURE_DEVOPS_IS_ON_PREMISES=true
AZURE_DEVOPS_COLLECTION=your-collection
AZURE_DEVOPS_API_VERSION=6.0
AZURE_DEVOPS_AUTH_TYPE=pat
AZURE_DEVOPS_PERSONAL_ACCESS_TOKEN=your-personal-access-token
Alternative Authentication Methods (On-Premises)
# NTLM Authentication
AZURE_DEVOPS_AUTH_TYPE=ntlm
AZURE_DEVOPS_USERNAME=your-username
AZURE_DEVOPS_PASSWORD=your-password
AZURE_DEVOPS_DOMAIN=your-domain

# Basic Authentication
AZURE_DEVOPS_AUTH_TYPE=basic
AZURE_DEVOPS_USERNAME=your-username
AZURE_DEVOPS_PASSWORD=your-password

# Entra ID Authentication (requires az CLI)
AZURE_DEVOPS_AUTH_TYPE=entra
Client Configuration
Cursor Configuration
Add this to your Cursor MCP settings:
{
  "mcpServers": {
    "azure-devops": {
      "command": "npx",
      "args": ["@ryancardin/azuredevops-mcp-server@latest"],
      "env": {
        "AZURE_DEVOPS_ORG_URL": "https://dev.azure.com/your-organization",
        "AZURE_DEVOPS_PROJECT": "your-project",
        "AZURE_DEVOPS_IS_ON_PREMISES": "false",
        "AZURE_DEVOPS_AUTH_TYPE": "pat",
        "AZURE_DEVOPS_PERSONAL_ACCESS_TOKEN": "your-personal-access-token"
      }
    }
  }
}
Claude Desktop Configuration
Add this to your Claude Desktop MCP configuration file:
{
  "mcpServers": {
    "azure-devops": {
      "command": "npx",
      "args": ["@ryancardin/azuredevops-mcp-server@latest"],
      "env": {
        "AZURE_DEVOPS_ORG_URL": "https://dev.azure.com/your-organization",
        "AZURE_DEVOPS_PROJECT": "your-project",
        "AZURE_DEVOPS_IS_ON_PREMISES": "false",
        "AZURE_DEVOPS_AUTH_TYPE": "pat",
        "AZURE_DEVOPS_PERSONAL_ACCESS_TOKEN": "your-personal-access-token"
      }
    }
  }
}
Creating a Personal Access Token (PAT)
For Azure DevOps Services (cloud), you'll need to create a Personal Access Token with appropriate permissions:
- Go to your Azure DevOps organization
- Click on your profile icon in the top right
- Select "Personal access tokens"
- Click "New Token"
- Give it a name and select the appropriate scopes:
- Work Items: Read & Write
- Code: Read & Write
- Project and Team: Read & Write
- Build: Read
- Release: Read
For Azure DevOps Server (on-premises), create the PAT in your on-premises instance following similar steps.
Complete Environment Variables Reference
* Required if AZURE_DEVOPS_IS_ON_PREMISES=true
** Required based on chosen authentication type
The ALLOWED_TOOLS environment variable allows you to restrict which tool methods are available. This is completely optional - if not specified, all tools will be enabled.
Format: Comma-separated list of method names with no spaces.
Example:
ALLOWED_TOOLS=listWorkItems,getWorkItemById,searchWorkItems,createWorkItem
This would only enable the specified work item methods while disabling all others.
Entra ID Authentication
For Entra ID authentication, ensure you have Azure CLI installed and authenticated:
az login
The server supports AZ CLI, AZD, and Azure PowerShell modules as long as you're authenticated.
Usage
Once the server is running, you can interact with it using the MCP protocol. The server exposes several tools for different Azure DevOps functionalities.
Note: By default, only a subset of tools are registered in the index.ts file to keep the initial implementation simple. See the Tool Registration section for information on how to register additional tools.
Example: List Work Items
{
  "tool": "listWorkItems",
  "params": {
    "query": "SELECT [System.Id], [System.Title], [System.State] FROM WorkItems WHERE [System.State] = 'Active' ORDER BY [System.CreatedDate] DESC"
  }
}
Example: Create a Work Item
{
  "tool": "createWorkItem",
  "params": {
    "workItemType": "User Story",
    "title": "Implement new feature",
    "description": "As a user, I want to be able to export reports to PDF.",
    "assignedTo": "[email protected]"
  }
}
Example: List Repositories
{
  "tool": "listRepositories",
  "params": {
    "projectId": "MyProject"
  }
}
Example: Create a Pull Request
{
  "tool": "createPullRequest",
  "params": {
    "repositoryId": "repo-guid",
    "sourceRefName": "refs/heads/feature-branch",
    "targetRefName": "refs/heads/main",
    "title": "Add new feature",
    "description": "This PR adds the export to PDF feature"
  }
}
Architecture
The project is structured as follows:
src/
Interfaces/: Type definitions for parameters and responsesServices/: Service classes for interacting with Azure DevOps APIsTools/: Tool implementations that expose functionality to clientsindex.ts: Main entry point that registers tools and starts the serverconfig.ts: Configuration handling
Service Layer
The service layer handles direct communication with the Azure DevOps API:
WorkItemService: Work item operationsBoardsSprintsService: Boards and sprints operationsProjectService: Project management operationsGitService: Git repository operationsTestingCapabilitiesService: Testing capabilities operationsDevSecOpsService: DevSecOps operationsArtifactManagementService: Artifact management operationsAIAssistedDevelopmentService: AI-assisted development operations
The tools layer wraps the services and provides a consistent interface for the MCP protocol:
WorkItemTools: Tools for work item operationsBoardsSprintsTools: Tools for boards and sprints operationsProjectTools: Tools for project management operationsGitTools: Tools for Git operationsTestingCapabilitiesTools: Tools for testing capabilities operationsDevSecOpsTools: Tools for DevSecOps operationsArtifactManagementTools: Tools for artifact management operationsAIAssistedDevelopmentTools: Tools for AI-assisted development operations
The MCP server requires tools to be explicitly registered in the index.ts file. By default, only a subset of all possible tools are registered to keep the initial implementation manageable.
To register more tools:
- Open the
src/index.ts file
- Add new tool registrations following the pattern of existing tools
- Build and restart the server
A comprehensive guide to tool registration is available in the TOOL_REGISTRATION.md file in the repository.
Note: When registering tools, be careful to use the correct parameter types, especially for enum values. The type definitions in the Interfaces directory define the expected types for each parameter. Using the wrong type (e.g., using z.string() instead of z.enum() for enumerated values) will result in TypeScript errors during build.
Example of registering a new tool:
server.tool("searchCode",
  "Search for code in repositories",
  {
    searchText: z.string().describe("Text to search for"),
    repositoryId: z.string().optional().describe("ID of the repository")
  },
  async (params, extra) => {
    const result = await gitTools.searchCode(params);
    return {
      content: result.content,
      rawData: result.rawData,
      isError: result.isError
    };
  }
);
Troubleshooting
Common Issues
Authentication Errors
- Ensure your Personal Access Token is valid and has the required permissions
- Check that the organization URL is correct
unexpected status code: 203
- This often indicates placeholder or incorrect configuration values were used
- Verify
AZURE_DEVOPS_ORG_URL uses your real org URL (not your-organization)
- Verify
AZURE_DEVOPS_PROJECT and AZURE_DEVOPS_PERSONAL_ACCESS_TOKEN are real values
High Context/Token Consumption
- Restrict tool registration with
ALLOWED_TOOLS to only the methods you need
- Example:
ALLOWED_TOOLS=listWorkItems,getWorkItemById,listPullRequests,getPullRequestChangedFiles
TypeScript Errors During Build
- Use
npm run build:ignore-errors to bypass TypeScript errors
- Check for missing or incorrect type definitions
Runtime Errors
- Verify that the Azure DevOps project specified exists and is accessible
Contributing
Contributions are welcome! Here's how you can contribute:
- Fork the repository
- Create a feature branch (
git checkout -b feature/amazing-feature)
- Commit your changes (
git commit -m 'Add some amazing feature')
- Push to the branch (
git push origin feature/amazing-feature)
- Open a Pull Request
Please ensure your code passes linting and includes appropriate tests.